Saturday, 30 November 2024

Floral-Inspired Crafts for Christmas


Floral-Inspired Crafts

Floral-Inspired Crafts

Floral-inspired crafts are a beautiful and versatile way to add a touch of nature to your home decor. Here are a few ideas:

Floral Painted Canvas

Materials:

  • Canvas
  • Acrylic paints in various colours
  • Paintbrushes
  • Pencil
  • Ruler

Instructions:

  1. Sketch the Design: Lightly sketch a floral design on the canvas using a pencil. This can be as simple or complex as you like.
  2. Base Coat: Apply a base coat of paint to the canvas. This can be a solid colour or a gradient.
  3. Paint the Flowers: Use different shades of paint to create depth and dimension in your flowers.
  4. Add Details: Use a fine brush to add details like petals, leaves, and stems.
  5. Finish Touches: Once the paint is dry, you can add a varnish or sealant to protect your artwork.

Floral Paper Flowers

Materials:

  • Coloured paper
  • Scissors
  • Glue
  • Wire
  • Floral tape

Instructions:

  1. Cut the Paper: Cut the paper into various shapes, such as circles, squares, and rectangles.
  2. Fold the Paper: Fold the paper into different shapes to create petals, leaves, and other floral elements.
  3. Assemble the Flower: Glue the petals together to form a flower.
  4. Attach the Flower: Attach the flower to a wire using floral tape.
  5. Create a Bouquet: Combine several flowers to create a bouquet.

Floral Embroidered Pillow

Materials:

  • Pillow cover
  • Embroidery hoop
  • Embroidery floss
  • Embroidery needle
  • Floral pattern

Instructions:

  1. Transfer the Pattern: Transfer your floral pattern onto the pillow cover fabric using a pencil.
  2. Embroider the Design: Use embroidery stitches to fill in the design.
  3. Finish the Pillow: Once the embroidery is complete, sew the pillow cover closed.

Tips:

  • Inspiration from Nature: Look to nature for inspiration when designing your floral crafts.
  • Colour Palette: Choose a colour palette that complements your home decor.
  • Practice Makes Perfect: Don't be afraid to experiment and practice.
  • Patience is Key: Some crafts, like embroidery, require patience and precision.
  • Have Fun: The most important thing is to enjoy the process of creating.

By following these tips and using your imagination, you can create beautiful and unique floral-inspired crafts.

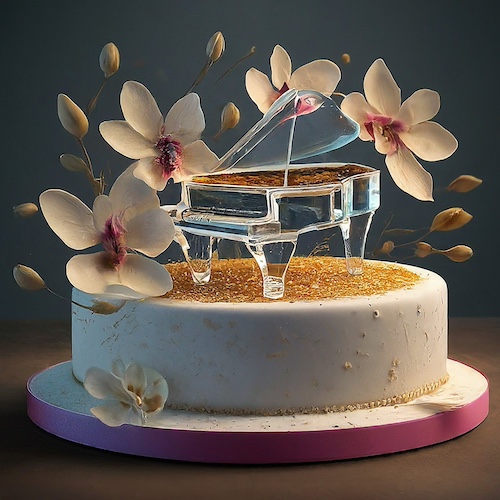
Decorated Cake Idea: Melody Sugar Piano


Melody Sugar Piano Cake

Decorated Cake Idea: Piano Cylinder


Piano Cylinder Cake

Decorated Cake Idea: Piano Spark of Orchids


Piano Spark of Orchids Cake

Decorated Cake Idea: Chocolate Piano


Chocolate Piano Cake

Friday, 29 November 2024

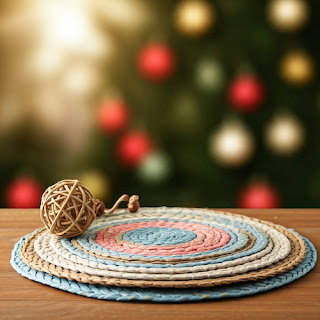
Festive Placemats for Christmas


Festive Placemats

Festive Placemats

Festive placemats add a touch of elegance and personality to your holiday table. Here are a few ideas for creating placemats using fabric, paper, or natural materials:

Fabric Placemats:

  • Materials:
    • Fabric (felt, burlap, cotton, etc.)
    • Thread
    • Needle
    • Scissors
    • Iron-on adhesive (optional)
    • Decorative elements (ribbons, lace, buttons, etc.)
  • Instructions:
    • Cut the fabric to the desired size for your placemats.
    • If desired, decorate the fabric with iron-on adhesive or sew on decorative elements.
    • Hem the edges of the fabric to prevent fraying.

Paper Placemats:

  • Materials:
    • Paper (card-stock, construction paper, wrapping paper, etc.)
    • Glue
    • Scissors
    • Decorative elements (glitter, sequins, stickers, etc.)
  • Instructions:
    • Cut the paper to the desired size for your placemats.
    • Decorate the paper with glue and decorative elements.
    • Let the glue dry completely before using the placemats.

Natural Materials Placemats:

  • Materials:
    • Natural materials (leaves, pine cones, acorns, etc.)
    • Glue
    • Card-stock or cardboard base
  • Instructions:
    • Cut the card-stock or cardboard to the desired size for your placemats.
    • Arrange the natural materials on the base and glue them in place.
    • Let the glue dry completely before using the placemats.

Tips:

  • Match the placemats to your table setting: Choose colours and materials that complement your overall table decor.
  • Get creative with your designs: There are endless possibilities for decorating your placemats.
  • Consider your guests: If you have guests with allergies, avoid using materials that may cause irritation.
  • Protect your table: Placemats can help protect your table from spills and scratches.
  • Have fun! Creating your own placemats is a fun and rewarding activity.

By following these simple steps, you can create beautiful and personalised placemats that will add a festive touch to your holiday table.

Prosciutto-Wrapped Melon


Prosciutto-Wrapped Melon

Prosciutto-Wrapped Melon

Prosciutto-Wrapped Melon is a light and refreshing appetiser that is perfect for any occasion. It is easy to make and can be customised to your liking.

Ingredients:

  • For the Melon:
    • 1 honeydew melon, cantaloupe, or watermelon, cut into cubes or wedges

  • For the Prosciutto:
    • 8 slices prosciutto

Instructions:

  1. Wrap the Melon:
    • Place a slice of prosciutto on a flat surface.
    • Top with a cube or wedge of melon.
    • Wrap the prosciutto around the melon, tucking the ends underneath.
  2. Serve:
    • Arrange the wrapped melon on a platter and serve immediately.

Nutrition Information:

  • Calories: 100
  • Protein: 8g
  • Fat: 7g
  • Carbohydrates: 5g

Tips:

  • You can use any type of melon for this recipe.
  • If you want to make the appetiser ahead of time, wrap the melon and prosciutto and store them in the refrigerator for up to 2 hours.
  • You can also add other ingredients to the prosciutto, such as fresh herbs, spices, or cheese.
  • For a more elegant presentation, you can use a melon baller to scoop out the melon.

Additional tips:

  • Prosciutto is a cured ham that is made from pork. It is a good source of protein and has a salty, savoury flavour.
  • Melon is a good source of vitamins and minerals, such as vitamin C, potassium, and magnesium.
  • This appetiser is a great way to get your daily dose of fruits and vegetables.
  • It is also a low-calorie and low-fat option.

I hope you enjoy this recipe!

Thursday, 28 November 2024

Kale Salad with Lemon-Tahini Dressing


Kale Salad with Lemon-Tahini Dressing

 Kale Salad with Lemon-Tahini Dressing

Ingredients:

  • 1 bunch of kale, washed and stemmed
  • 1/2 cup of cherry tomatoes, halved
  • 1/4 cup of red onion, finely chopped
  • 1/4 cup of toasted pine nuts or sunflower seeds
  • 1/4 cup of crumbled feta cheese

For the dressing:

  • 1/4 cup of tahini
  • 1/4 cup of lemon juice
  • 2 tablespoons of olive oil
  • 1 clove of garlic, minced
  • 1/4 teaspoon of salt
  • 1/8 teaspoon of black pepper

Instructions:

  1. Make the dressing: In a blender or food processor, combine the tahini, lemon juice, olive oil, garlic, salt, and pepper. Blend until smooth and creamy.
  2. Prepare the kale: In a large bowl, massage the kale with your hands for a few minutes until it becomes tender.
  3. Assemble the salad: Add the cherry tomatoes, red onion, pine nuts or sunflower seeds, and feta cheese to the kale.
  4. Dress the salad: Drizzle the lemon-tahini dressing over the salad and toss to coat evenly.

Nutrition Information:

  • Calories: 200
  • Protein: 5g
  • Fat: 15g
  • Carbohydrates: 10g
  • Fiber: 4g

Tips:

  • You can use any type of nut or seed in this salad.
  • If you don't have tahini, you can substitute it with peanut butter or almond butter.
  • You can add other vegetables to this salad, such as carrots, cucumbers, or bell peppers.
  • This salad is best served fresh, but it will keep in the refrigerator for up to 2 days.

Additional Tips:

  • To make the kale even more tender, you can massage it with a little bit of olive oil before adding the dressing.
  • You can also add a pinch of red pepper flakes to the dressing for a little bit of heat.
  • This salad is a great way to use up leftover vegetables.

Possible Variations:

  • Add a can of chickpeas for extra protein.
  • Use a different type of cheese, such as Parmesan or goat cheese.
  • Add a handful of dried cranberries or raisins for a touch of sweetness.
  • Use a different type of nut or seed, such as walnuts or almonds.

Benefits of Kale:

Kale is a leafy green vegetable that is packed with nutrients. It is a good source of vitamins A, C, and K, as well as fibre and calcium. Kale is also a good source of antioxidants, which can help protect your cells from damage.

Benefits of Lemon-Tahini Dressing:

Tahini is a sesame seed paste that is a good source of protein and healthy fats. Lemon juice is a good source of vitamin C. Together, these ingredients make a creamy and flavourful dressing that is also good for you.

Overall, this kale salad is a healthy and delicious way to get your daily dose of nutrients.

I hope you enjoy this recipe!

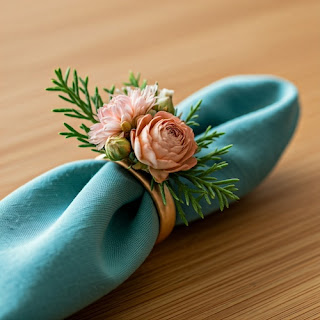
Elegant Napkin Rings for Christmas Dinner


Elegant Napkin Rings

Elegant Napkin Rings

Napkin rings are a simple yet elegant way to elevate your table setting. Here are a few ideas for creating unique napkin rings using ribbon, greenery, or dried flowers:

Ribbon Napkin Rings

Materials:

  • Ribbon (satin, velvet, or burlap)
  • Scissors
  • Hot glue gun

Instructions:

  1. Cut the Ribbon: Cut a length of ribbon, about 18-24 inches long.
  2. Create the Loop: Tie the ribbon into a loop, adjusting the size to fit around a napkin.
  3. Secure the Loop: Use hot glue to secure the ends of the ribbon, ensuring a tight and secure knot.
  4. Add Embellishments: Optional: Add embellishments like small bows, beads, or dried flowers to the ribbon.

Greenery Napkin Rings

Materials:

  • Fresh or dried greenery (eucalyptus, rosemary, or pine needles)
  • Floral wire
  • Ribbon (optional)

Instructions:

  1. Gather the Greenery: Cut small sprigs of greenery.
  2. Create the Ring: Wrap the greenery around a napkin, securing it with floral wire.
  3. Add a Ribbon: Optional: Tie a ribbon around the greenery for a festive touch.

Dried Flower Napkin Rings

Materials:

  • Dried flowers (lavender, rosemary, or baby's breath)
  • Floral wire
  • Ribbon (optional)

Instructions:

  1. Gather the Flowers: Select small bundles of dried flowers.
  2. Create the Ring: Wrap the flowers around a napkin, securing them with floral wire.
  3. Add a Ribbon: Optional: Tie a ribbon around the flowers for a finishing touch.

Tips:

  • Match Your Decor: Choose materials that complement your table setting.
  • Experiment with Colours and Textures: Use a variety of colours and textures to create unique napkin rings.
  • Keep it Simple: Sometimes, less is more. A simple, elegant napkin ring can be just as effective as a more elaborate one.
  • Use Natural Materials: Incorporate natural materials like wood, twine, or cork for a rustic look.
  • Personalise Your Napkin Rings: Add personal touches, such as monogrammed initials or small charms.

By following these simple steps, you can create beautiful and personalised napkin rings that will elevate your table setting.


Steamed Egg Custard for Chinese New Year

  Steamed Egg Custard for Chinese New Year Yields: 4 servings Prep time: 15 minutes Cook time: 20 minutes Ingredients: 4 large eggs 1/2 cup ...