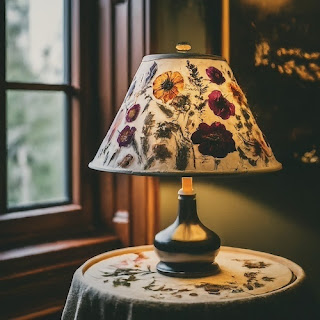
Materials:
Lamp with a plain fabric or paper shade (avoid flammable materials)
Variety of pressed flowers in different colours, shapes, and sizes (such as daisies, ferns, baby's breath)
Fabric stiffener (optional)
Scissors
Craft glue (thin and clear recommended)
Small paintbrush
Mod Podge or clear coat spray (optional)
Ruler (optional)
Pencil (optional)
Instructions:
- Gather Your Supplies: Choose a lamp with a plain lampshade that allows light to pass through. Gather your pressed flowers and ensure they are completely dry and flat.
- Plan Your Design (Optional): You can create a freeform collage or plan a more structured design beforehand. If you prefer a structured design, sketch a layout on a separate piece of paper using a ruler and pencil.
- Apply Fabric Stiffener (Optional): This step is optional but can help stiffen a flimsy lampshade and make it easier to adhere the flowers. Follow the instructions on the fabric stiffener and allow the shade to dry completely.
- Arrange the Flowers: Lay out your pressed flowers on a flat surface to visualise your design. Experiment with different combinations and placements until you find a captivating arrangement that complements the shape of the lampshade.
- Attach the Flowers: Using a small paintbrush, carefully apply a thin layer of craft glue to the back of each flower. Gently press the flower onto the desired location on the lampshade. Hold it for a few seconds to ensure a secure bond.
- Build Layers and Dimension: Start with larger pressed flowers as a base layer and gradually add smaller ones and delicate greenery on top for a layered effect and added depth.
- Filling in Gaps: Once you've attached most of the flowers, take a step back and assess your lampshade. Fill in any empty spaces with additional small flowers or greenery to create a cohesive design.
- Seal the Flowers (Optional): To add extra protection and prevent dust buildup, you can apply a light coat of Mod Podge or a clear coat spray once the glue has dried completely. Allow the sealant to dry thoroughly before using the lamp.
Tips:
- Use a variety of pressed flowers in different colours, shapes, and textures for a visually interesting lampshade.
- Work with small amounts of glue to avoid creating visible marks on the flowers or lampshade.
- If a flower is particularly delicate, use a toothpick dipped in glue instead of a brush.
- Consider using a practice sheet of paper to experiment with your flower arrangement before transferring it to the lampshade.
- Ensure the flowers you use are not flammable and won't obstruct airflow around the light bulb.
- Pressed flowers can fade over time. To minimise this, avoid placing the lamp in direct sunlight.
- Let your creativity flow and enjoy creating a unique and beautiful lampshade that adds a touch of floral charm to your space!


