Monday, 29 April 2024

Pink Roses in a Glazed Vase


Simple Sweet Flowers Arrangement

Materials

Vase: The vase is made of ceramic, with a glazed finish in a cream-lime colour. The glaze creates a smooth, glossy surface that reflects light and adds depth to the colour.

Flowers

Bright Pink Roses: The vibrant pink roses are likely hybrid tea roses, known for their large, showy blooms with velvety petals.

Sea Lavender: These are actually not lavender, but Limonium, a flower with small, clustered blooms that come in various shades, including the purple seen in the image.

Arrangement Method

The arrangement likely uses a formal or structured style. Here's a breakdown of how it might be achieved:

  1. Focal Point: The florist would have started by placing a few rose stems strategically in the centre of the vase, creating a focal point. The stems would be cut at a length that allows the roses to sit high in the vase, showcasing their full beauty.
  2. Supporting Flowers: Sea lavender sprigs would then be added, likely cut shorter than the roses. The florist would carefully position them to fill any gaps around the roses and add texture and movement to the arrangement.
  3. Balance and Harmony: The florist would continue adding roses and sea lavender, ensuring a balanced distribution of colour and texture throughout the vase. They might use a technique called "massing" where several stems of the same flower are grouped together to create a bolder impact.
  4. Finishing Touches: Once the main structure is complete, the florist might add a few strategically placed sprigs of sea lavender or a single, fully opened rose bud to further enhance the arrangement's visual appeal.

Sunday, 28 April 2024

Classic Vanilla Cake : A Mother's Day Delight!


Best Classic Vanilla Cake

Ingredients:

For the Cake:

3 ½ cups (433g) cake flour (spooned and levelled)

1 teaspoon salt

2 teaspoons baking powder

¾ teaspoon baking soda

1 ½ cups (340g) unsalted butter, softened to room temperature

2 cups (400g) granulated sugar

3 large eggs + 2 additional egg whites, at room temperature

1 tablespoon pure vanilla extract

1 ½ cups (360ml) buttermilk, at room temperature

Instructions:

  1. Preheat your oven to 350°F (175°C) and grease and flour two 8-inch round cake pans. Line the bottoms with parchment paper for easy removal.
  2. Whisk the dry ingredients: In a medium bowl, whisk together the cake flour, salt, baking powder, and baking soda. Set aside.
  3. Cream the butter and sugar: Using a stand mixer fitted with a paddle attachment (or a hand mixer with a large bowl), cream together the softened butter and sugar on medium-high speed for about 3 minutes until light and fluffy. Scrape down the sides and bottom of the bowl as needed.
  4. Beat in the eggs: Add the eggs and egg whites one at a time, beating well after each addition. Scrape down the bowl as needed.
  5. Incorporate the vanilla: Stir in the vanilla extract until combined.
  6. Alternate wet and dry ingredients: Begin and end with the dry ingredients, adding them in three batches with the buttermilk in two batches, alternating between the two. Mix on low speed just until combined after each addition. Do not over-mix!
  7. Pour the batter: Divide the batter evenly between the prepared cake pans.
  8. Bake: Bake for 25-30 minutes, or until a toothpick inserted into the centre comes out clean.
  9. Cool the cakes: Let the cakes cool in the pans for 10 minutes before transferring them to a wire rack to cool completely.

Tips:

  • For a richer flavour, use brown sugar instead of half of the granulated sugar.
  • To make sure your room temperature ingredients are truly ready, leave the eggs and buttermilk out on the counter for about 30 minutes before you begin.
  • Don't over-mix the batter. Once the dry ingredients are just incorporated, stop mixing. Over mixing can lead to a tough cake.
  • If you don't have buttermilk, you can make your own by adding 1 tablespoon of white vinegar or lemon juice to 1 cup of milk. Let it sit for 5 minutes before using.

Nutritional Information:

A slice of this classic vanilla cake (1/16th of the recipe) contains approximately:

  • Calories: 300
  • Fat: 15g
  • Saturated Fat: 8g
  • Carbohydrates: 40g
  • Sugar: 30g
  • Protein: 3g

Please note: This is an estimate and the actual nutritional information may vary depending on the specific ingredients you use.

Decorating Ideas:

Once your cake has cooled, you can frost it with your favourite buttercream icing and decorate it for Mother's Day! Here are some ideas:

  • Pipe roses or other flowers with icing.
  • Write a special message with icing.
  • Top the cake with fresh flowers (avoid roses with thorns!).
  • Decorate with sprinkles or chocolate shavings.
  • Use fondant cut-outs for a more personalised touch.

This classic vanilla cake recipe is a delicious and versatile base for your Mother's Day dessert creation. With a little love and creativity, you can create a beautiful and memorable cake for your mom!

Saturday, 27 April 2024

Oyster Omelet (Orh Luak)


Oyster Omelet (Orh Luak)

Ingredients:

For the Batter:

3 tbsp tapioca flour

1 tbsp all-purpose flour

1 tbsp cornstarch

300ml water

1 tsp fish sauce

1 tsp soy sauce

1 tsp sesame oil

¼ tsp ground black pepper

¼ tsp salt

For the Omelet:

    • 12 fresh oysters, shucked (reserve the oyster liquor)
    • 3 large eggs
    • 2 tbsp grapeseed oil, or vegetable oil
    • 1/2 cup chopped scallions (reserve some for garnish)
    • 1 cup bean sprouts (optional)
    • Pinch of white pepper

Instructions:

  1. Make the Batter: In a medium bowl, whisk together tapioca flour, all-purpose flour, cornstarch, water, fish sauce, soy sauce, sesame oil, black pepper, and salt until smooth. Set aside.
  2. Prepare the Oysters: Drain the oysters, reserving the liquor. Pat them dry with paper towels. If the oysters are large, cut them in half.
  3. Heat the Pan: Heat grapeseed oil in a well-seasoned cast iron skillet or large non-stick pan over medium-high heat.
  4. Cook the Oyster Base: Add half the reserved oyster liquor to the hot pan. Swirl to coat the bottom. Pour in about 1/3 of the batter, swirling the pan to create a thin layer. Arrange half the oysters evenly over the batter.
  5. Add the Eggs: Carefully crack the eggs into the pan, allowing them to spread around the oysters. Reduce heat to medium-low and let cook for 2-3 minutes, or until the edges of the omelet begin to set.
  6. Flip and Cook: Sprinkle half the scallions and bean sprouts (if using) over the omelet. Carefully slide a spatula under the omelet and flip it over. Cook for another 1-2 minutes, or until the eggs are cooked through.
  7. Repeat and Serve: Repeat steps 4-6 to cook the remaining omelet mixture and oysters. Transfer the cooked omelet to a plate and garnish with remaining scallions and a sprinkle of white pepper. Serve immediately with your favourite dipping sauce, like chilli sauce or a simple mixture of soy sauce, rice vinegar, and a touch of sugar.

Tips:

  • Use a well-seasoned cast iron skillet for even heat distribution and a crispy omelet bottom.
  • Ensure your oil is hot enough before adding the batter to prevent sticking.
  • Don't overcook the omelet. The oysters should be plump and juicy, and the eggs should be just set.
  • For a richer flavour, add a teaspoon of oyster sauce to the batter.
  • Experiment with other vegetables like shredded cabbage or chopped carrots.

Nutritional Information (per serving):

  • Calories: 350-400 (depending on oil)
  • Protein: 20g
  • Fat: 20g
  • Carbohydrates: 30g
  • Cholesterol: 200mg
  • Sodium: 500mg (depending on soy sauce usage)

Enjoy this delicious and satisfying Oyster Omelet!

Friday, 26 April 2024

Candle Holder Wreath


Candle Holder Wreath Flowers Arrangement

Materials:

Wire wreath base (circular)

Floral shears or sharp knife

Floral wire

Greenery:

Ferns (lush, maidenhair, or sword ferns depending on desired look)

Flowers:

Pink larkspur

Hydrangea florets (any colour)

Peonies (blush, soft, or full bloom depending on preference)

Roses (classic, antique, David Austin roses, or long-stemmed based on style)

Ribbon (lace, burlap, geometric, or any ribbon that complements your theme)

Pillar candle and holder (size to fit the wreath)

Instructions:

1 Prep the wreath base: Secure the floral wire to the wreath base at a designated spot. This will be your tying point for the ribbon and attaching the flowers later.

2 Prepare the greenery: Cut the fern fronds to various lengths. Shorter pieces will be used at the base of the wreath, while longer ones can create a cascading effect.

3 Attach the greenery: Starting at the base of the wreath, secure the fern fronds with floral wire, working your way around the wreath. Overlap the fronds slightly to create a full and lush base.

4 Prepare the flowers: Cut the stems of each flower at an angle with sharp shears or a knife. Remove any leaves that will fall below the base of the wreath.

5 Assemble the flowers: Start by placing larger blooms like peonies or roses towards the back of the wreath. Use floral wire to securely attach the stems to the wreath base, tucking the stems in between the fern fronds.

6 Add dimension: Alternate flower sizes and colours for visual interest. Place smaller blooms like larkspur and hydrangea florets in between the larger flowers or towards the front of the wreath. Use floral wire to secure them.

7 Incorporate the ribbon: Thread the chosen ribbon through the pre-secured floral wire on the wreath base. Wrap the ribbon around the wreath, weaving it in between the flowers and greenery as desired. Secure the ribbon at the end with a knot or a small bobby pin.

8 Attach the candle holder: Secure the candle holder to the centre of the wreath using floral wire. Ensure it's stable and won't tilt when the candle is placed.

9 Finishing touches: Fluff the flowers and greenery to achieve your desired look. Add any final touches like berries, small pinecones, or decorative picks (optional).

Tips:

Soak the floral foam (if using) before attaching it to the wreath base for better flower hydration.

Consider the weight of the flowers and greenery when choosing a wreath base. A sturdier base is recommended for heavier blooms.

Use a variety of flower bud stages (open blooms and unopened buds) for a more natural look.

Mist the flowers lightly with water to keep them fresh, especially if displayed for long periods.


Wednesday, 24 April 2024

Horizontal Flowers Arrangement


Horizontal Arrangement


Materials:

Floral shears or sharp knife

Floral container (rectangular or long and shallow)

Floral foam (cut to fit the container)

Chicken wire (optional, for extra stability)

Ribbon or twine (optional, for decoration)


Flowers:

    • Hydrangeas (various colours)
    • Cornflowers (blue or white)
    • Rosebuds (any colour)
    • Strawflowers (natural or dyed)
    • Lavender sprigs
    • Roses (optional)


Instructions:

  1. Prep the container: Soak the floral foam in water until fully saturated. Place the foam inside the floral container. If using chicken wire for stability, push the cut pieces into the floral foam to create a grid-like structure.
  2. Prepare the flowers: Cut the stems of each flower at a diagonal angle with sharp shears or a knife. This helps maximise water absorption. Remove any leaves that will fall below the water line in the arrangement.
  3. Assemble the arrangement: Start with the larger flowers like hydrangeas. Place them towards the centre and back of the container, pushing the stems firmly into the floral foam.
  4. Add dimension: Build the arrangement by alternating flower heights and textures. Place taller flowers like rosebuds or cornflowers towards the centre and front, while shorter flowers like strawflowers and lavender can fill in gaps or be placed at the edges.
  5. Refine and decorate: Use your floral shears to adjust flower placement and length as needed. For a whimsical touch, you can add decorative elements like greenery, berries, or small pinecones.
  6. Finishing touches: Secure the arrangement by tying a ribbon or twine around the base of the container. Mist the flowers lightly with water to keep them fresh.

Tips:

  • Consider the colour palette and overall theme when choosing flowers.
  • Play with different textures and shapes for a visually interesting arrangement.
  • For a more compact design, keep the flowers clustered together. To create a looser, more airy look, space the flowers out a bit more.
  • If using a rose as the focal point, place it last to ensure it stands out.
  • Top up the water level in the container every few days to keep the flowers hydrated.

Tuesday, 23 April 2024

Chicken with Black Bean Sauce and Vegetables


Chicken with Black Bean Sauce and Vegetables


Ingredients:

Chicken:

1 pound boneless, skinless chicken breasts, cut into bite-sized cubes

1 tablespoon cornstarch

1 teaspoon soy sauce

1/2 teaspoon sesame oil

Vegetables:

1/2 cup dried Chinese black mushrooms, rehydrated and sliced

1 medium carrot, sliced

1/2 cup button mushrooms, sliced

1/2 green bell pepper, cut into chunks

1 medium onion, sliced

2 cloves garlic, minced

1 inch ginger, grated

Black Bean Sauce:

    • 3 tablespoons fermented black beans, rinsed and roughly chopped
    • 2 tablespoons soy sauce
    • 1 tablespoon rice vinegar or Shaoxing wine
    • 1 tablespoon oyster sauce
    • 1 teaspoon sugar
    • 1/4 cup chicken broth
    • Other:
    • 2 tablespoons vegetable oil
    • 2 scallions, thinly sliced (optional, for garnish)

Instructions:

  1. Prepare the chicken: Combine chicken cubes with cornstarch, soy sauce, and sesame oil. Marinate for 15-20 minutes.
  2. Prepare the sauce: Combine chopped black beans, soy sauce, rice vinegar, oyster sauce, sugar, and chicken broth in a small bowl. Set aside.
  3. Cook the chicken: Heat 1 tablespoon of oil in a large wok or skillet over high heat. Add chicken and stir-fry in batches until browned and cooked through. Remove the chicken and set aside.
  4. Cook the vegetables: Add remaining tablespoon of oil to the pan. Add onions, garlic, and ginger, stir-fry for 30 seconds until fragrant. Then add the carrots, black mushrooms, button mushrooms, and green pepper. Stir-fry for 2-3 minutes until vegetables start to soften.
  5. Combine and finish: Return the chicken to the pan. Stir the black bean sauce and pour over the chicken and vegetables. Stir-fry for 1-2 minutes until the sauce thickens and everything is coated.
  6. Serve: Garnish with sliced scallions (if using) and serve immediately over steamed rice.

Tips:

  • For spicier dish, add a pinch of chilli flakes or a chopped chilli pepper with the veggies.
  • Experiment with other vegetables like broccoli, snap peas, or baby corn.
  • If you don't have fermented black beans, substitute with 2 tablespoons store-bought black bean sauce.

Nutritional Information (per serving):

  • Calories: approximately 350
  • Protein: 35g
  • Fat: 15g
  • Carbs: 20g

This dish provides a good balance of protein, fibre, and healthy fats. It's a source of vitamins and minerals from the vegetables, and fermented black beans offer gut-healthy probiotics.

Monday, 22 April 2024

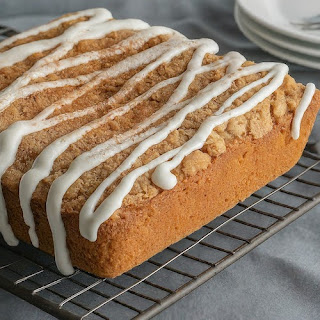
Coffee Cake


Coffee Cake

Ingredients:

Dry:

1 ¾ cups all-purpose flour (can substitute ½ cup whole wheat flour for added fibre)

2 teaspoons baking powder

½ teaspoon baking soda

¼ teaspoon salt

½ cup chopped walnuts or pecans (optional)


Wet:

    • ½ cup unsalted butter, softened
    • ¾ cup granulated sugar (can reduce to ½ cup for less sweetness)
    • 1 large egg
    • 1 teaspoon vanilla extract
    • ½ cup plain yogurt (substitute sour cream for a tangier flavour)
    • ¼ cup milk
  • Streusel Topping:
    • ½ cup packed light brown sugar
    • ¼ cup all-purpose flour
    • 2 tablespoons unsalted butter, softened
    • ¼ teaspoon ground cinnamon
    • Whipped Cream [Optional]

Instructions:

  1. Preheat your oven to 375°F (190°C) and grease an 8x8 inch baking pan.
  2. In a medium bowl, whisk together the flour(s), baking powder, baking soda, and salt. If using nuts, toss them in with the dry ingredients to coat.
  3. In a separate bowl, cream together the softened butter and sugar until light and fluffy. Beat in the egg and vanilla extract until well combined.
  4. Add the yogurt and milk to the wet ingredients, mixing until just incorporated. Don't over mix!
  5. Gradually add the dry ingredients to the wet ingredients, mixing until a batter forms. Be careful not to over mix – a few lumps are okay.
  6. Pour the batter into the prepared pan.
  7. In a small bowl, combine the brown sugar, flour, softened butter, and cinnamon with a fork or pastry cutter until it resembles a crumbly mixture. Sprinkle the streusel topping evenly over the cake batter.
  8. Bake for 30-35 minutes, or until a toothpick inserted into the centre comes out clean.
  9. Let the cake cool slightly on a wire rack before serving.

Nutritional Tips:

  • Swapping half the all-purpose flour for whole wheat flour adds fibre, keeping you fuller for longer.
  • Reducing the sugar content keeps it a bit lighter. You can also use a natural sweetener like honey or maple syrup.
  • Using yogurt instead of sour cream cuts down on saturated fat.
  • Whipped Cream not included.

Enjoy this delicious coffee cake warm with a cup of coffee or tea!

Steamed Egg Custard for Chinese New Year

  Steamed Egg Custard for Chinese New Year Yields: 4 servings Prep time: 15 minutes Cook time: 20 minutes Ingredients: 4 large eggs 1/2 cup ...